
Now that my sewing room is coming together, my sketchbook and sewing machine are finally out of hiding. I need a space to hang fabric inspiration, sketches and ideas. I wanted to find a pretty large cork board so I would not run out of space, but of course whenever I am looking for something super specific I can’t find it. So it’s on to another DIY project!
The cork board would be 4′ x 4′, that’s a pretty good chunk of wall space so I thought it was important it also doubled as a design feature. This was a super easy project, it was done in a couple hours and totally worth the effort.
Supply List
 2′ x 4′ Medium Density Fiberboard (2) – Home Depot – $6.42
 2′ x 4′ Cork Board (2) – Home Depot $4.97
 DAP Strongstik Instant Grab Adhesive – Home Depot $3.97
 Pillowfort Black Arrow Shower Curtain – Target 16.99
 3M General Purpose Spray Adhesive – Home Depot $5.77
 Scotch Expressions Washi Tape – Michael’s $2.99
 Extra Heavy Weight Picture Wire – Jo Ann Fabric $3.99
On hand: Staple gun and staples, anchors for picture wire
Total: $56.49
I bought two 2′ x 4′ cork boards from home depot, and they had plywood that was already cut to 4′ x 4′ that I could use for the backing, perfect! But when I bought the plywood and carried it out to my tiny Honda Civic I realized there was no way this was getting into my car. I secretly hoped some person with a truck would take pity on me and offer to drive it to my home, but I ended up just walking it right back in and returning it. In lieu of the perfectly sized plywood I bought fiberboard that was also 2′ x 4′. I figured if I put the backing up and down and the cork board left to right it would be sturdy enough to hang.
I used the DAP adhesive to glue all 4 pieces together and then left to set for a couple hours. Once it had time to dry I came back with a staple gun and spaced staples across the whole board. For the covering, I knew I wanted white and black and planned on making time for the fabric store. But while at target for some other household items I decided to look at their table cloths, sheets and curtains. I often find what I’m looking for this way, and this time was no different. I stumbled across a shower curtain that was perfect!

The shower curtain needed ironing before moving on to the next step, that was the most boring part of this project, but very necessary. Next I added a layer of spray adhesive to the cork board before covering it in the fabric. After it had a few minutes to dry, I flipped it over and put in staples around the edges. The spray adhesive it really to assist in the stapling and prevent ripples, it’s not nearly enough to hold the fabric in place long term. I used a hammer to pound in any staples that weren’t flush and then trimmed the excess fabric.
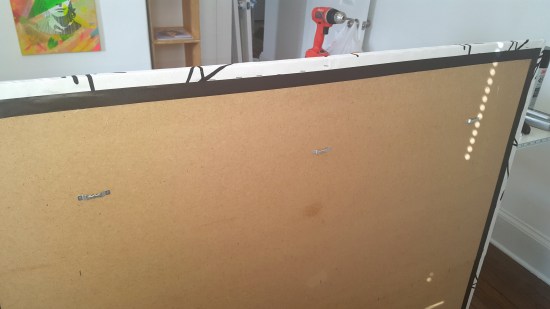
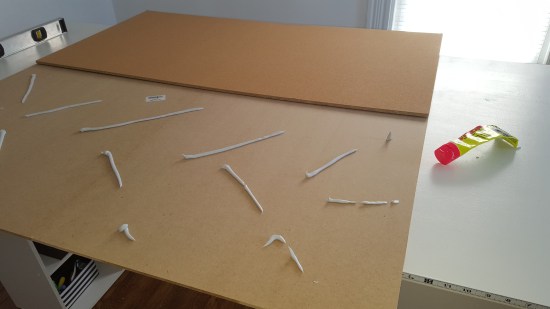
I could have stopped at trimming the fabric, but I decided to go over the edged with the craft tape for a more neat finish and prevent any fraying. The board was now ready to hang. First I tried the picture hangers in the photo, but they were not strong enough. One cork board is not very heavy, but two with the fiberboard base really started to add up. I moved on to the heavy duty wire, this worked like a charm. Seth’s assistance was necessary to get it on the wall because it was so awkward and heavy.
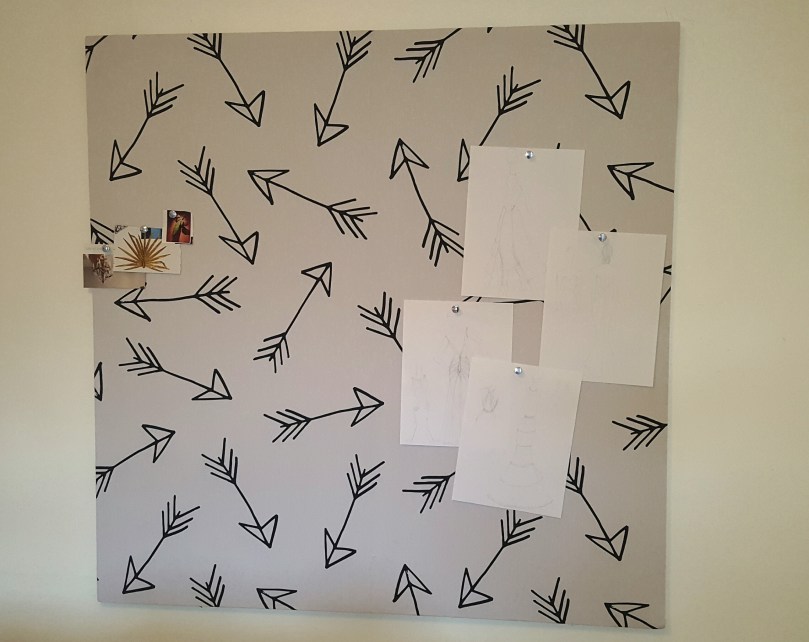 Done! I’m already starting to fill it up.
