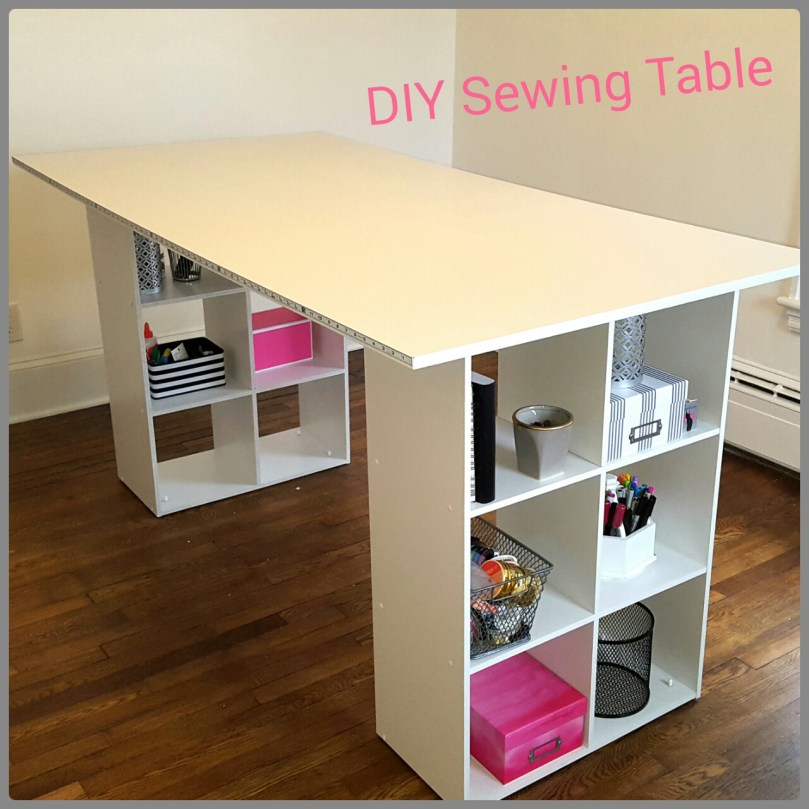
 The house has been a pretty good creative outlet, but I’m beyond ready to get back to sewing. But first things first, I needed a proper table for drafting, cutting and sewing. I decided to go the route of making my own table rather than buying one, the cost was reasonable and it’s exactly what I needed.
 Supply List
- ClosetMaid 6 cube organizer (2) – $29.88 each Home Depot
- ¾ inch poplar plywood – $35.10 Home Depot
- Behr semi-gloss paint in white – $27.48 Home Depot
- Furniture glides 4 pack (2) – $3.97 each Hom Depot
- Starrett Measure Stix (2) – $6.24 each Amazon
- Paint tray and roller – already have
- Drill and screws – already have
- Sandpaper – already have
- Total: $142.76
First step was to build the cubes that would be the base of the table. Buying the ClosetMaid cubes saved a lot effort and provides extra storage, one can never have too much storage. Building the cubes was pretty easy, Seth and I built both in less than an hour. Once they were finished we added furniture gliders to the bottom so I can easily move the table around the room when I need to. Four slides per side is enough for the table to move easily enought, we pre-drilled holes in each corner and then the sliders twisted right in.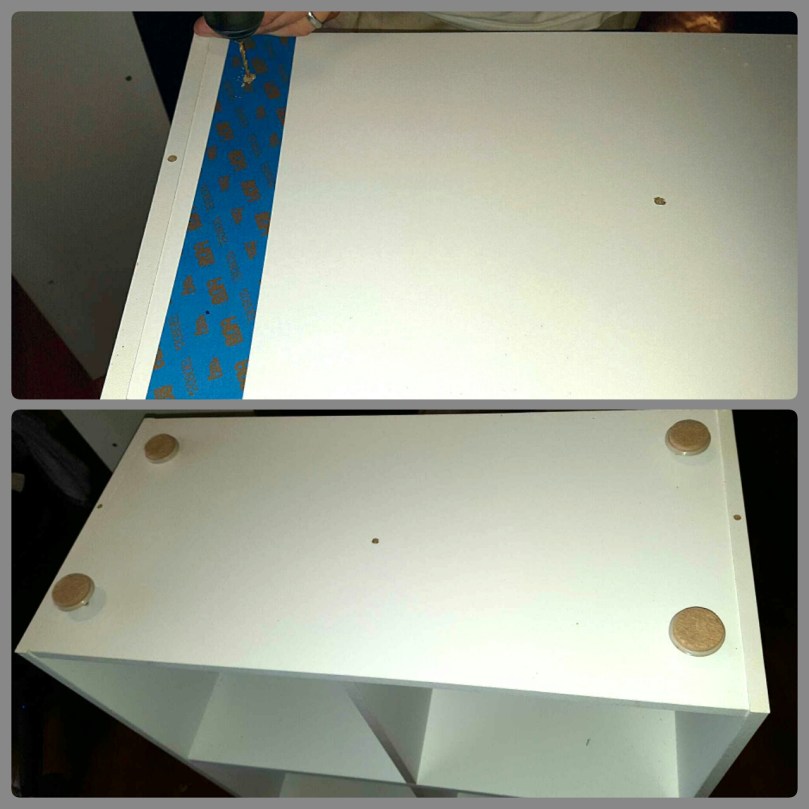
Next was to complete the table top. I had the plywood cut down to size (3ft x 6ft) at Home Depot when we bought it. We do have a table saw, but one less step to do at home, and also solved the issue of fitting the whole piece in the car. I picked out paint when we bought the cubes, semi-gloss to best match the finish, then asked home depot to color match. Even though it’s just white, I really wanted to make sure the top and bottom pieces looked like they belonged together. A whole gallon of paint was plenty, but I’m sure we’ll be able to use it down the line with so many projects to go on the list.
I sanded all sides of the plywood with 100 grit sandpaper to prep for painting. I painted the table over a couple of hours, it was a great multitasking project since I had to wait about 20 minutes between each coat. I did five coats on the bottom side and seven coats on the top, I tried to get it as smooth and even as possible.
Once both sides were painted it was time to assemble. I marked six inches in from each side and 3 inches in from each end to ensure the table top lined up correctly with the cubes on both sides. Four screws from the underside of each cube connected the base to the top.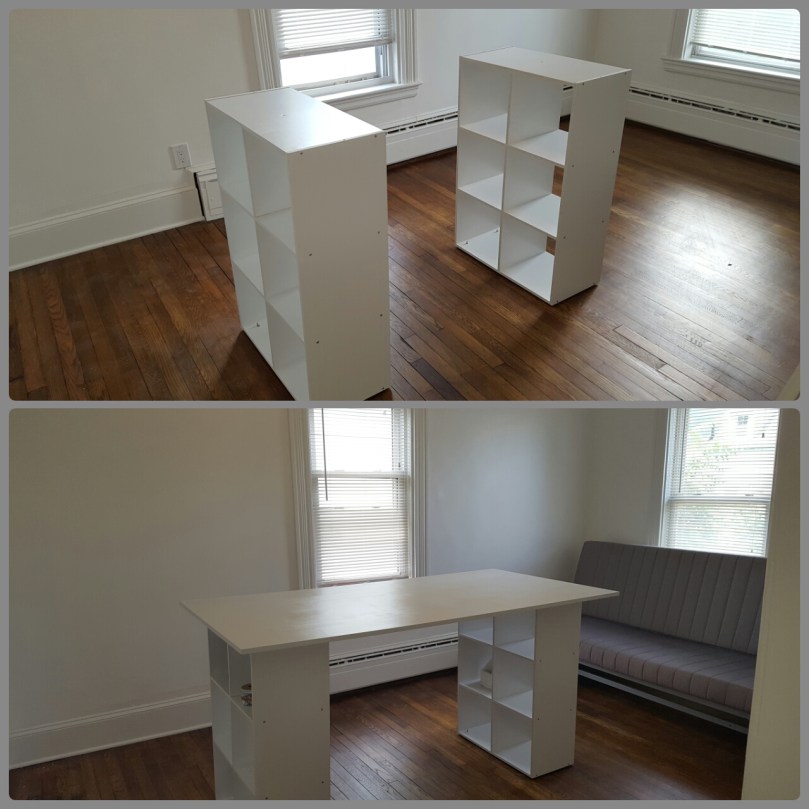
For the final touch I added measuring tape to both sides of the long edge, and done! The question is what will be my first sewing project?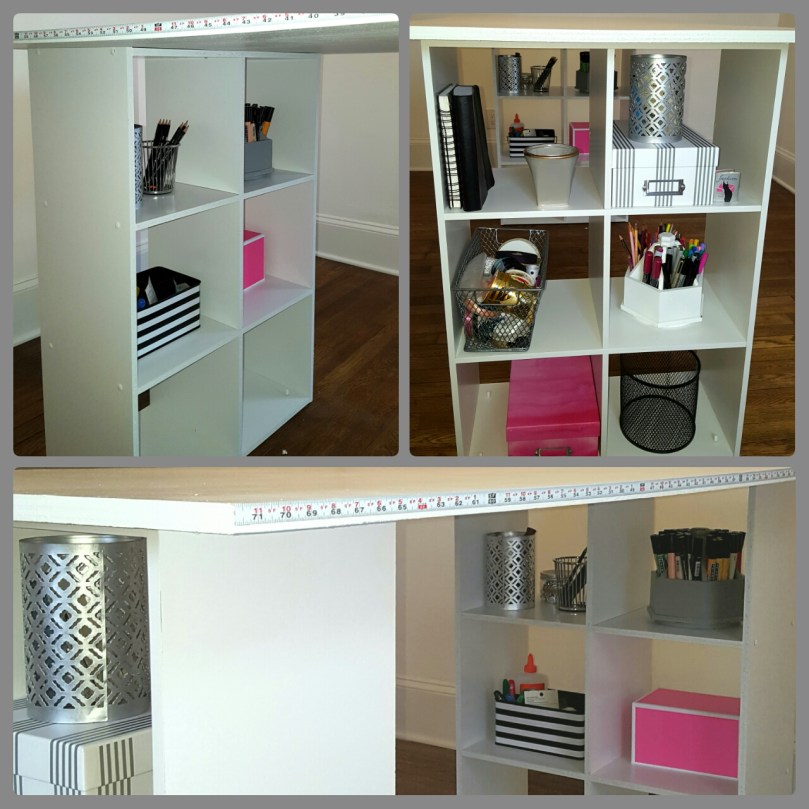

This is super cool!! It turned out great, I love it!!!
Tonee
https://infoellablog.wordpress.com
LikeLiked by 1 person